
- Coverage119 ZIP codes · 2 counties
- HoursOpen 24/7
Cooktop Repair Near Me, Across Long Island
How the visit is charged
The diagnostic fee is credited against the repair
Answered 24/7Three-hour arrival window90-day parts warranty
- Diagnosis
- The fault is found before anything is quoted
- Approval
- Work starts only after your yes
- Hours
- Phones answered 24/7
- Warranty
- Parts 90 days · labor 30 days
Request a Repair
Two short steps. No cost and no obligation to book.
- Answered 24/7
- 3-hour arrival window
- Price approved first
- EPA 608 refrigerant handling
- 90-Day Parts & 30-Day Labor Warranty
- Open 24/7
- 119 ZIP codes covered
The cooktop in figures
- Usual visit length
- 1–2 hours
- Faults on file
- 40
- Makes we work on
- 31
Anatomy · Cooktop
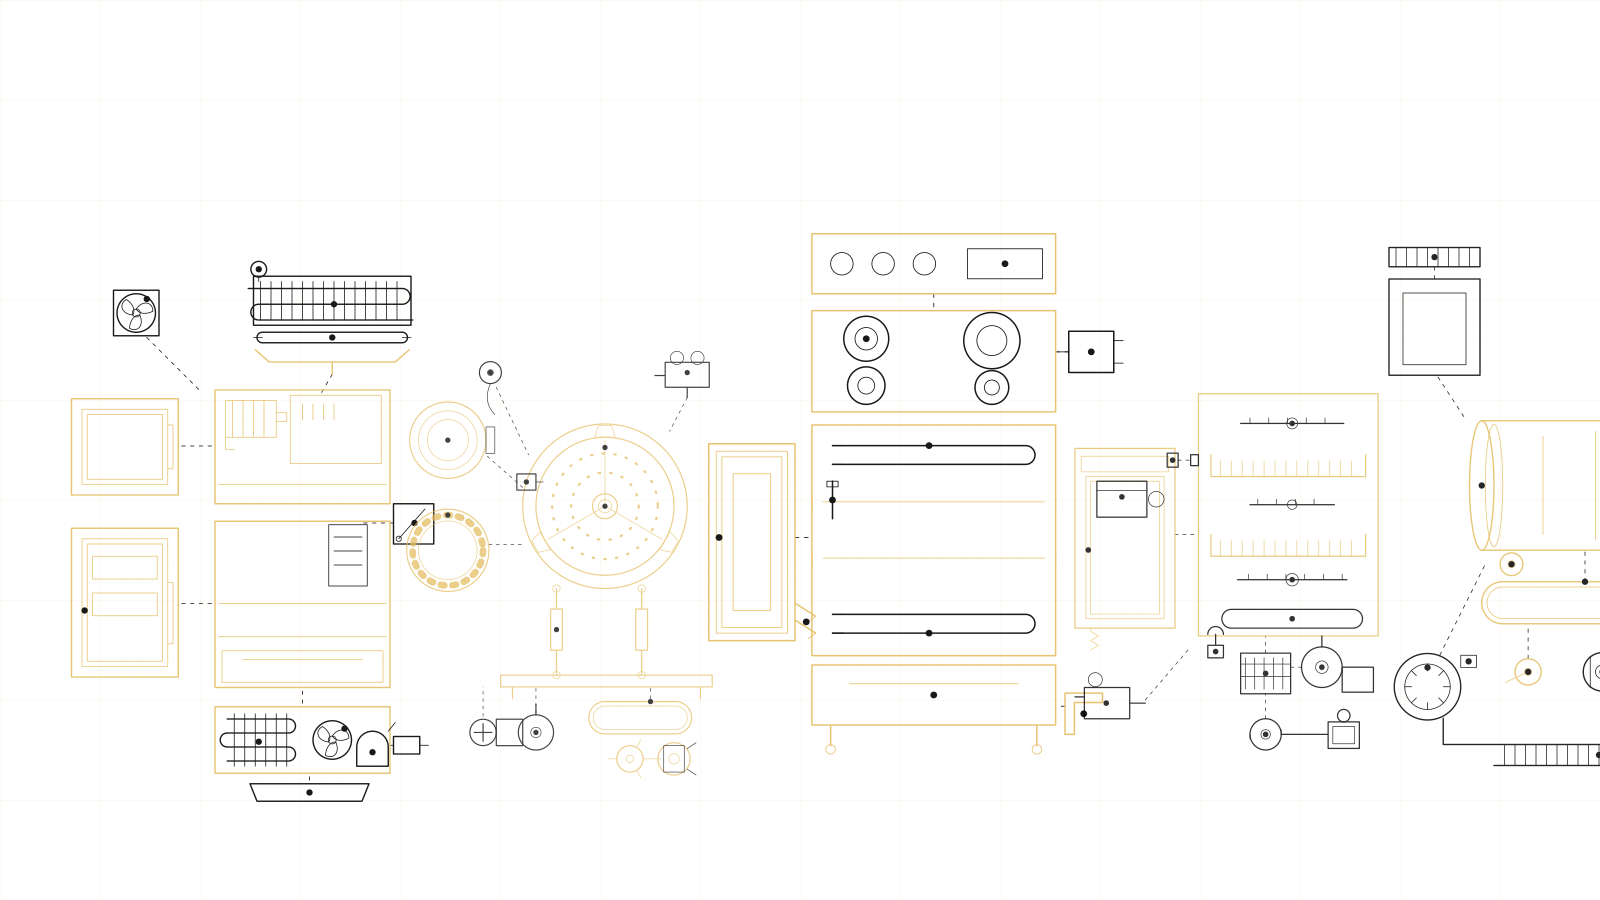
The parts of a cooktop that wear out first
- 01Glass-ceramic surfaceCracks begin at a chip or where a cold pan met a hot zone, and a cracked top exposes live parts: a safety issue, not a cosmetic one.
- 02Touch-control panelMoisture beneath the glass or a failing membrane makes keys respond only sometimes, or leaves the whole panel unresponsive.
- 03Radiant / induction coilIf a single zone is dead while the others heat, the coil or its lead is far likelier than the control board.
- 04Element limiterThis disc cycles a radiant zone on and off; when it fails, the zone runs only at full power or not at all.
- 05Element lead and connectorA scorched spade terminal lets a zone work until it heats up, then cut out.
- 06Burner box and insulationInsulation knocked out of place lets heat travel sideways and damages wiring at the neighboring zone.
- 07Cooling fan (induction)Induction electronics shut themselves down when they overheat, so a fan clogged with cabinet dust shows up as an apparently random error code.
- 08Mounting clips and frame sealA top that is not clamped evenly lets spills reach the burner box and loads the glass unevenly at one corner.
- 09Element switch / power boardA zone that refuses to switch off, or a bridge zone that never pairs, is a switching fault rather than a heating one.
- 10Terminal block and supplyLosing one supply leg at the block leaves half the zones working, which looks like an appliance fault but is not.
Sequence of checks
Where a technician starts on a cooktop
- What we test, in turn
- on gas, igniters and burner ports come first; on induction, the generator board and the coil — a patchy flame or a burner that will not catch is almost always a port or igniter fault, not the valve
- The symptom owners misjudge
- an induction cooktop throwing an error under heavy use, which is often overheating or poor ventilation rather than a failed generator
- Why Long Island matters here
- professional-grade gas cooking in remodelled kitchens from the North Shore estates out to the Hamptons, which calls for high-output burner service that mass-market procedures never address
Fault register · 40 entries
The cooktop failures behind most of our calls
01
One Gas Burner Will Not Light
Priority: mediumThe igniter clicks at one burner but the gas does not catch, or it catches only after several seconds of clicking. The other burners behave normally, which places the fault at that burner rather than in the supply.
- Likely origins
- burner cap misaligned on its head · burner ports clogged by boil-over · wet or dirty igniter electrode · cracked electrode insulator · partly blocked valve orifice
- The fix
- We lift the cap and head, inspect the ports and the electrode gap, and watch where the spark lands when the knob is turned. Ports are cleared with a fine wire rather than a toothpick, the electrode is dried and cleaned, and a cracked insulator is replaced. The cap is reseated squarely. The burner is lit repeatedly at low and high settings to confirm prompt, even ignition.
02
Radiant or Coil Element Not Heating
Priority: highOne surface element stays cold while the others work normally. The element itself may have opened, but its infinite switch, its receptacle on coil models, or a broken wire can produce exactly the same symptom.
- Likely origins
- element burned open · failed infinite switch · burned coil receptacle · loose or burned wire at the switch · failed limiter on a radiant element
- The fix
- With the breaker off, we measure the element's resistance and inspect its terminals, then test the infinite switch and the wiring between them. On coil tops, the receptacle is checked for arcing marks. The failed element, switch or receptacle is replaced and terminals renewed where heat-damaged. The element is run through its full range to confirm it heats and cycles properly.
03
Igniters Clicking When Not in Use
Priority: mediumThe spark igniters keep clicking with the knobs off, or one carries on clicking after its burner has lit. Moisture or a fault in a spark switch is telling the module to keep sparking.
- Likely origins
- moisture in a spark switch after cleaning or a spill · worn spark switch on a valve stem · failed spark module · knob or valve stem misaligned · wiring shorting to the chassis
- The fix
- If clicking started after cleaning, let the cooktop dry thoroughly before testing. We isolate each spark switch in turn to find which one is closing, and inspect the harness for chafing. A worn switch or harness is replaced, and the spark module tested if every switch checks out. All burners are lit and turned off several times to confirm the clicking stops each time.
04
Glass Top Cracked by Impact
Priority: criticalA crack runs across the glass, often from a dropped pan, jar or heavy lid. The glass protects the elements and wiring beneath it, and a crack lets spills reach live parts.
- Likely origins
- dropped cookware or jars · impact on the glass edge · heavy item placed down hard · chip spreading into a crack · stress from uneven support
- The fix
- Stop using the cooktop and switch it off at the breaker until the glass is replaced. We confirm the correct replacement top for your model, remove the cracked glass and inspect the elements and wiring beneath for spill damage. The new top is fitted with its seals and supports positioned correctly. Each element is then tested and the glass checked for even seating.
05
Gas Smell Around the Cooktop
Priority: criticalA brief smell as a burner lights is common. A smell that lingers, appears with the burners off, or grows stronger is a leak until proven otherwise.
- Likely origins
- loose flexible connector behind the unit · leaking valve or manifold joint · burner failing to ignite while gas flows · knob turned slightly on · cracked regulator
- The fix
- If the smell is strong, turn the burners off, do not operate switches, leave the house and call the gas utility from outside. Once it is safe, we leak-test the supply connector, regulator, manifold and valve joints with solution and a detector, and check ignition on every burner. Faulty fittings or valves are replaced. A final leak test of each joint confirms the installation is sound.
06
Heat Uneven Across the Pan
Priority: mediumFood cooks hotter in a ring or on one side even on a level pan. The element or flame is not producing heat evenly, or the pan and the zone are mismatched.
- Likely origins
- partially failed radiant element · gas burner ports partly blocked · burner cap off-center · warped cookware · induction coil and pan size mismatched
- The fix
- We observe the element glow pattern or the flame around the burner, and test with a flat pan of known quality. Blocked ports are cleared and caps reseated; a radiant element with a dead section is replaced. On induction, we check coil detection with the correct pan size. A boiling test on each zone confirms more even heat.
07
Flame Small or Weak
Priority: mediumA burner gives a small, soft flame even with the knob on high, and a pot of water takes noticeably longer to boil. When every burner is weak the supply is suspect; when only one is, the restriction is at that burner.
- Likely origins
- clogged burner ports or orifice · low gas supply pressure · incorrect orifice after LP conversion · partly closed valve · regulator fault
- The fix
- We compare the flame on each burner to see whether one or all are weak, which separates a local blockage from a supply issue. The orifice and ports are cleared, and supply pressure measured at the regulator. Incorrect orifices are replaced to match the gas type. Flame height is checked on high and low after correction.
08
No Burner Lights
Priority: highNone of the gas burners will light and there may be no clicking at all. The fault lies in the shared supply or ignition rather than at individual burners.
- Likely origins
- gas supply valve closed · spark module failed · no power to the cooktop · supply problem from the utility · regulator fault
- The fix
- We confirm power reaches the spark module and gas reaches the cooktop, checking other gas appliances in the home. The spark module and its harness are tested, and the shut-off valve and regulator inspected. Whichever part has failed is renewed. Every burner is then lit in turn and checked for a stable, full flame.
09
Induction Zone Not Heating
Priority: highOne induction zone shows power but produces no heat, or ignores the pan entirely, while the other zones work. The coil, its generator board, or the pan-detection circuit for that zone has failed.
- Likely origins
- failed generator or power board section · open induction coil · coil connector loose or burned · temperature sensor under the zone faulty · pan not magnetic enough
- The fix
- We first test with a pan we know to be induction-compatible, which rules out the cookware. The zone's coil, its connector and the generator output are then measured with the glass lifted. The failed coil or board is replaced, and the cooling path checked so it is not lost the same way. Each power level on the zone is tested with a boiling test.
10
Infinite Switch Not Regulating
Priority: highThe element heats only on high, will not heat at all, or ignores the knob setting. The infinite switch, which cycles power to the element, has worn or burned contacts.
- Likely origins
- burned switch contacts · failed bimetal inside the switch · loose terminal at the switch · knob shaft stripped · heat damage from a failing element
- The fix
- We measure switch output at each setting with the element connected, and check the terminals for discoloration. A failed switch is replaced and its wiring renewed if burned. The element is run from low to high while we watch it cycle, confirming the switch now regulates power as the knob is turned.
11
Spark Electrode Not Sparking
Priority: mediumOne burner stays silent when its knob is turned while the others click normally. The electrode at that burner, its ceramic insulator or the lead running back to the spark module has failed or is shorting.
- Likely origins
- cracked ceramic insulator · electrode lead broken or disconnected · electrode tip corroded · electrode wet from a spill · spark module output failed
- The fix
- We check for a spark in a darkened room and inspect the electrode and its lead. A cracked insulator or broken lead is replaced, and the electrode gap set correctly. If the electrode is sound, the module output for that burner is tested. The burner is lit repeatedly to confirm a strong, consistent spark.
12
Element Cutting In and Out
Priority: highAn element heats, stops, then heats again in an irregular pattern unrelated to normal cycling. A loose connection or a failing switch is interrupting power.
- Likely origins
- loose terminal at the element or switch · switch contacts arcing · coil element not seated in its receptacle · limiter tripping on a radiant element · wiring damaged by heat
- The fix
- We watch the element over several minutes on a fixed setting and measure current to distinguish normal cycling from an interruption. Terminals are inspected for heat discoloration and the receptacle checked on coil tops. Damaged connectors, switches or limiters are replaced. The element is run for an extended period to confirm stable heating.
13
Cooktop Completely Dead
Priority: highThere are no lights, no display and no heat from any zone. Either power is not reaching the cooktop at all, or the board that supplies the controls has failed, and a control lock can look surprisingly similar.
- Likely origins
- tripped double-pole breaker · burned terminal block · failed power supply board on induction · control lock engaged · loose supply connection
- The fix
- We check the breaker and measure voltage at the cooktop's terminal block, then inspect the block and supply connections for burning. On induction units, the power supply board and control lock are checked. The failed part is replaced or connections remade. All zones and controls are tested after power is restored.
14
Yellow or Orange Flame
Priority: mediumBurner flames are yellow or orange rather than blue, and may leave soot on pans. Combustion is incomplete, usually because the air-gas mixture is wrong.
- Likely origins
- dirty or misaligned burner · debris in the venturi · incorrect orifice for gas type · humidifier or cleaning spray near the cooktop · burner cap off-center
- The fix
- We inspect the burner, cap and venturi and clean them of debris. The orifice is checked against the gas type. We also ask about humidifiers and sprays, which can color the flame without a fault. After correction, each burner should show a stable blue flame with small blue tips.
15
Induction Not Detecting the Pan
Priority: mediumThe zone flashes a pan symbol and does not heat even with a pan in place. Either the pan is unsuitable or the detection circuit has failed.
- Likely origins
- pan base not magnetic · pan too small for the zone · pan warped or off-center · coil sensor fault · generator board fault
- The fix
- We test with a magnet and with a known compatible pan of the right size. If the zone still fails to detect, the coil and generator are tested. Faulty parts are replaced. We confirm the zone detects and heats a variety of suitable pans.
16
Element or Burner Will Not Turn Off
Priority: criticalAn element stays hot, or a gas burner keeps burning, after its control has been turned to off. Heat that cannot be stopped is a safety fault and the cooktop should not be used until it has been repaired.
- Likely origins
- welded switch contacts · failed relay on induction · valve stuck open · knob shaft broken · control board fault
- The fix
- Switch off the cooktop's breaker, or close the gas shut-off valve for a gas unit, and do not use it until repaired. We test the switch, relay or valve and replace the faulty part. All zones are tested to confirm they turn off on command.
17
Burner Cap or Head Out of Place
Priority: mediumAfter cleaning, a cap that sits slightly askew gives a lopsided flame, delayed ignition or a burner that lights only on one side. Sealed burners depend on the cap and head locating precisely over the electrode and ports.
- Likely origins
- cap placed off its locating lugs · head rotated so ports do not align · wrong cap swapped between burners · cap warped by heat · debris under the cap
- The fix
- We remove each cap and head, clean their mating surfaces, and check that every part belongs to its own burner, since caps are often different sizes. The head is aligned with the electrode and the cap seated on its locating features. Warped caps are replaced. Each burner is lit and observed for an even, complete ring of flame.
18
Error Code on the Induction Display
Priority: mediumThe induction top shows a letter or number code and refuses to heat, or shuts off a zone. The code identifies a condition, such as overheating, a sensor fault or a communication failure, rather than the failed part.
- Likely origins
- cooling fan blocked or failed · temperature sensor fault · communication failure between boards · supply voltage problem · water on the touch controls
- The fix
- We record the code and consult the model's service data, then test the components it points to rather than replacing boards on the code alone. The fan, sensors and inter-board wiring are checked and supply voltage measured. The failed part is replaced, the code cleared and each zone run at high power to confirm it does not return.
19
Radiant Element Cracked or Burned
Priority: highThrough the glass, a radiant element shows a dark section, a sagging coil or a break. Part or all of the zone no longer glows.
- Likely origins
- coil broken from age · element support cracked · spill reaching the element through a cracked top · limiter failure overheating the element · impact on the glass above
- The fix
- With the breaker off, we lift the glass, inspect the element and its limiter, and measure their resistance. A damaged element is replaced with the correct size and wattage and its limiter set in position. The glass is resealed. The zone is run at several settings to confirm the full coil glows evenly.
20
Control Knob Broken or Missing
Priority: mediumA knob has cracked, spins loosely on its shaft or has gone missing, which makes it difficult to set a burner precisely or to be certain it is fully off. On gas models that uncertainty is a safety concern.
- Likely origins
- cracked knob insert · stripped or flattened valve shaft · knob melted by heat · knob lost during cleaning · wrong replacement knob
- The fix
- We check the valve or switch shaft for wear, then fit the correct replacement knob for the model. If the shaft is worn, the valve or switch is assessed for replacement. Each knob is turned through its full travel to confirm it engages and the off position is clear.
21
Element Heats Only on High
Priority: criticalAn element runs at full heat whatever the setting, or works only on high. The switch has welded closed, which can overheat food and the cooktop.
- Likely origins
- welded infinite switch contacts · failed switch bimetal · shorted wiring bypassing the switch · control relay stuck on induction or touch models · incorrect replacement switch
- The fix
- Avoid using the element until it is repaired. We measure switch output at each setting and inspect the wiring for a short that bypasses the switch. The switch or relay is replaced. The element is run from low to high to confirm it now cycles at lower settings.
22
Heat Felt Beyond the Zone
Priority: lowHeat seems to spread to the glass beside an active zone, or an unused zone feels warm. Some spread is normal on radiant glass; more than usual points to a fault.
- Likely origins
- normal heat conduction through glass · oversized pan bridging zones · element insulation displaced · wrong zone energized · residual heat indicator not showing
- The fix
- We measure glass temperature around the active zone and confirm which elements are actually energized, since crossed wiring can power the wrong one. Element insulation beneath the glass is inspected for displacement. Faults are corrected. Where the behavior is normal conduction, we explain it and confirm the residual heat indicator works.
23
Crack in the Cooktop Surface
Priority: criticalA crack has appeared at the edge of the glass, near a burner on a gas-on-glass top, or across an enamel surface. Cracks that start at edges often come from installation stress rather than impact.
- Likely origins
- installation stress at the countertop cut-out · heat from a pan near the edge · clamp over-tightened · impact on the edge · manufacturing flaw
- The fix
- Stop using the cooktop and switch it off, or close the gas supply, until the surface is replaced. We inspect the cut-out and the mounting clamps to find the stress point, so the new surface does not crack the same way. The replacement is fitted with correct support. Each burner or element is tested after fitting.
24
Coil Element Receptacle Burned
Priority: highThe socket a coil element plugs into shows burn marks or pitting, and the element heats only intermittently or not at all. Once a receptacle has arced, it will damage any new element plugged into it.
- Likely origins
- loose element terminals · element not fully seated · corroded terminals · overheated wiring · age
- The fix
- With power off at the breaker, we remove the element and inspect the receptacle, its terminals and the wiring behind it. A burned receptacle is replaced, and the element is replaced too if its terminals are pitted, since a damaged pair keeps arcing. Heat-damaged wiring is renewed. The element is run on high for several minutes to confirm a secure, cool connection.
Further entries on file · 16
- Scratches on the Glass Top
- Hot-Surface Light Not Working
- Induction Sensor Error
- Element Glowing After Switch-Off
- Bridge or Flex Zone Not Combining
- Zone Not Reaching Full Power
- Glass Cracked by Sudden Temperature Change
- Residual Heat 'H' After Cooking
- Burn From a Zone That Seemed Cold
- Zone Display Flashing
- Cooktop on the Wrong Supply Voltage
- Burner Valve Faulty
- Burner Goes Out When the Knob Is Released
- Induction Cooling Fan Failed
- Zone Cutting Out After a Few Minutes
- Terminal Block Burned or Discolored
Next step
Sounds like your machine?
A person picks up day or night, seven days a week.
Platforms · 31
Makes of cooktop on our books
These 31 names genuinely produce a cooktop; a pairing that was never manufactured has no page here.































Specification
Cooktop work, measured
- 1–2 hours
- Usual visit length
- 31
- Brands we repair
- 119
- ZIP codes covered
Consumable and protective parts
On a cooktop: One Gas Burner Will Not Light · Radiant or Coil Element Not Heating · Igniters Clicking When Not in Use · Heat Uneven Across the Pan
Motors, pumps and mechanical assemblies
On a cooktop: One Gas Burner Will Not Light · Igniters Clicking When Not in Use · Gas Smell Around the Cooktop · Flame Small or Weak
Control electronics and boards
On a cooktop: Element or Burner Will Not Turn Off · Error Code on the Induction Display · Element Heats Only on High · Hot-Surface Light Not Working
Service areas
Towns we cover for cooktop repair
- Great Neck
- Mineola & Garden City
- Hempstead
- Floral Park & Franklin Square
- Freeport & Baldwin
- Hewlett & East Rockaway
- Lynbrook & Rockville Centre
- Glen Cove
- Merrick & Bellmore
- Roslyn
- Westbury
- Bethpage & Farmingdale
- Hicksville
- Levittown & Wantagh
- Massapequa & Seaford
- Oyster Bay & Syosset
- Babylon & Lindenhurst
- Bay Shore & Islip
- Brentwood & Central Islip
- Commack & Deer Park
- Huntington
- Northport & Kings Park
- Lake Grove & Hauppauge
- Farmingville, Holtsville & Medford
- Patchogue & Sayville
- Bellport & Brookhaven
- Port Jefferson & Stony Brook
- Rocky Point & Wading River
Further reading
Notes written at the bench
Questions
Questions owners ask about cooktop repair
If yours is missing, put it to a coordinator directly.
Something not covered?
The line is staffed at all hours for Nassau and Suffolk.
What does appliance repair in Long Island cost?
The visit carries a diagnostic fee, which is credited toward the repair should you proceed. Once the technician has identified the real fault, you are given one fixed figure for parts and labor, and work begins only after you agree to it. That figure does not shift when the machine is opened. Typical repairs — pumps, valves, switches, elements, belts, fan motors — generally fall in the low-to-mid hundreds; control boards and sealed-system refrigeration work cost more. Ring (631) 729-9995 for a realistic range on your particular model.
Cooktop · Long Island
Servicing the cooktop on Long Island
The cooktop symptom that misleads most
Whatever the brand, the cooktop problem most frequently misjudged is an induction cooktop throwing an error under heavy use, which is often overheating or poor ventilation rather than a failed generator. Getting it wrong matters, because a mistaken reading leads to a mistaken part, and on a cooktop that part is often the costliest in the machine.
Ageing appliances and discontinued parts
Sturdy older appliances are often worth keeping, and Long Island has a good number of them: commercial-grade laundry with mechanical timers, professional ranges from the 1980s and 1990s, built-in refrigeration designed with servicing in mind. They were made to accept replacement parts and mostly still do.
The limitation is electronic rather than mechanical. A motor thirty years old can usually be found; a proprietary control board fifteen years old frequently cannot. We confirm parts availability while diagnosing and report the result before you make a decision.
What a fault code really tells you
We are often called to Long Island appliances that have already received the "code part" once. The story rarely varies: the code reappeared, another part was fitted, and the code reappeared once more. At that stage nobody has diagnosed anything; they have guessed, and the guesses now add up to more than one proper visit costs.
Interpreting a code properly requires knowing what the appliance measured to produce it. On most platforms that means entering a service mode and reading the sensors the machine relied on. For someone who services the platform it takes fifteen minutes; for someone who does not, it cannot be done.
Power supply, breakers and faults outside the appliance
A noticeable proportion of Long Island service calls turn out not to involve an appliance fault. A breaker that trips each time the dryer starts could be the dryer; just as plausibly the cause is a circuit that is shared or too small, a worn breaker that trips below its rating, or a neutral problem somewhere upstream. Changing components in the hope the symptom goes away is not a method we use.
The same goes for appliances that misbehave without failing outright — displays that reset, cycles that stop partway, motors that hum but will not turn. These often originate on the supply side. We confirm the appliance is receiving correct power before deciding the appliance is at fault, and where the installation is to blame we say so and refer it to the appropriate trade.
Book a visit
Describe the machine, then add contact details. Booking is free and places you under no obligation. You can also phone (631) 729-9995 and a dispatcher will note everything for you.
Arrange a cooktop visit
Two short steps. No cost and no obligation to book.
- Answered 24/7
- 3-hour arrival window
- Price approved first