
- Coverage119 ZIP codes · 2 counties
- HoursOpen 24/7
Dishwasher Repair Near Me, Across Long Island
How the visit is charged
The diagnostic fee is credited against the repair
Answered 24/7Three-hour arrival window90-day parts warranty
- Diagnosis
- The fault is found before anything is quoted
- Approval
- Work starts only after your yes
- Hours
- Phones answered 24/7
- Warranty
- Parts 90 days · labor 30 days
Request a Repair
Two short steps. No cost and no obligation to book.
- Answered 24/7
- 3-hour arrival window
- Price approved first
- EPA 608 refrigerant handling
- 90-Day Parts & 30-Day Labor Warranty
- Open 24/7
- 119 ZIP codes covered
The dishwasher in figures
- Usual visit length
- 1–2 hours
- Faults on file
- 40
- Makes we work on
- 27
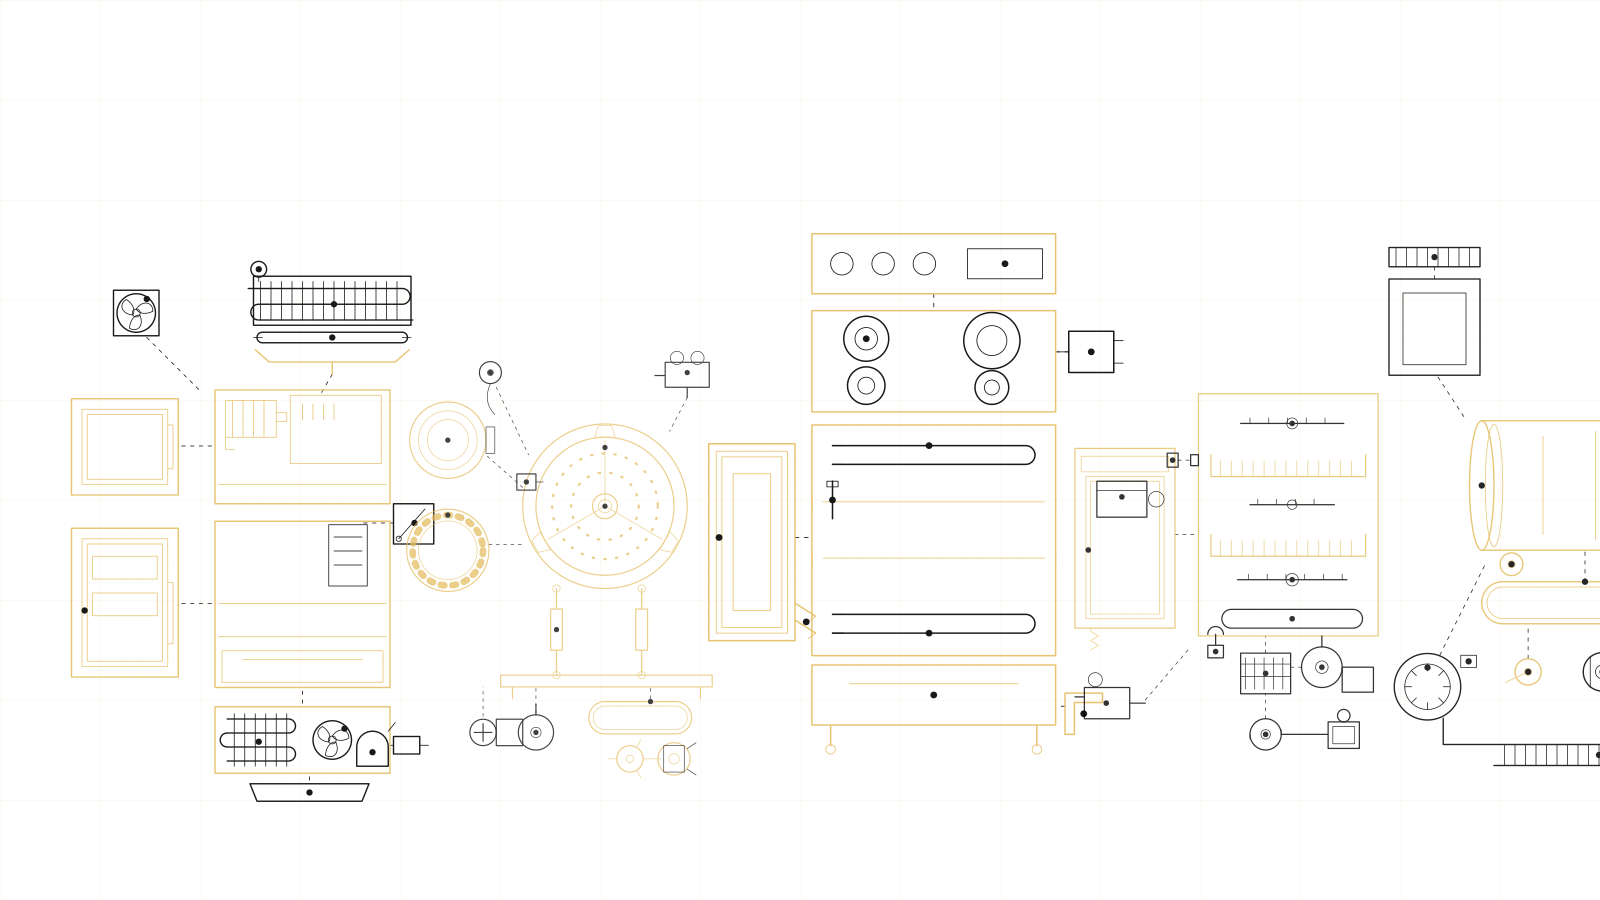
Anatomy · Dishwasher
The parts of a dishwasher that wear out first
- 01Water inlet valveSilt on the inlet screen causes an underfill, which shows up as poor cleaning rather than as an obvious supply problem.
- 02Float switchDebris holding it up prevents filling; if it sticks down, water rises past the tub and onto the floor.
- 03Upper spray armClogged nozzles or an arm that drags on its hub leave the upper rack dirty while the lower one comes out clean.
- 04Lower spray armThe same failure on the bottom arm, typically from grit lodged in the nozzles after the filter went uncleaned.
- 05Filter and sumpThis is where food debris really ends up; packed solid, it starves the wash pump and smells between loads.
- 06Wash pump (circulation)Hums without moving water, or turns but builds too little pressure, leaving dishes wet and still soiled.
- 07Drain pumpWater remaining in the tub when the cycle ends, or a puddle forming beneath the front edge.
- 08Heating elementIf the element is open the program still completes, but nothing dries and the last rinse never gets hot enough.
- 09Detergent and rinse-aid dispenserWhen the flap fails to open mid-cycle, detergent stays in the cup and a film coats every dish.
- 10Door latch and strikeA switch in the latch tells the control it is safe to start, so a worn latch can make the machine appear dead.
- 11Door gasketOnce hardened or pulled out of its channel, it lets steam escape at the top and water trickle down the door front.
Sequence of checks
Where a technician starts on a dishwasher
- What we test, in turn
- the water supply first, then the drain, then the spray arms — poor washing is much more often a fill, filter or spray-arm fault than a failed pump or motor
- The symptom owners misjudge
- plastics left wet and dishes left cool by a condensation-drying model, which on most European designs is intended behavior, not a defect
- Why Long Island matters here
- public groundwater that is usually soft to moderate, iron and manganese sediment that leaves stains rather than scale, and Suffolk private wells that can run harder — which together decide whether cloudy glassware is a water issue or a machine issue, and how the dishwasher's own hardness setting should be configured
Fault register · 40 entries
The dishwasher failures behind most of our calls
01
Water Left Standing in the Tub
Priority: highWater sitting at the base of the tub after a cycle ends means the machine tried to pump out and could not. The obstruction is usually between the filter and the sink connection, though a pump that hums without moving water is also common.
- Likely origins
- clogged drain filter · blocked drain hose · failed drain pump · garbage disposal knockout plug · clogged air gap
- The fix
- We bail the sump and start with the filter assembly and the sump inlet, since that is where most blockages sit. Next the drain hose is checked for kinks and for a disposal connection that was never knocked through. If the path is clear, the drain pump is tested for voltage and impeller freedom. A full drain cycle is then run and timed to confirm the tub empties completely.
02
Dishes Coming Out Dirty
Priority: mediumPlates emerging with film, grit or baked-on residue usually indicate that water is not reaching them with enough force or heat. Loading habits contribute, but persistent poor results across every rack point to a circulation or temperature fault inside the machine.
- Likely origins
- clogged filter assembly · blocked spray arm jets · weak wash pump motor · low incoming water temperature · failed heating element
- The fix
- Our technician first inspects the filter and each spray arm for debris lodged in the jets. Water temperature at the tub is measured against what the cycle expects, and the wash motor is observed under load for full pressure. Worn or failed parts are replaced, and a loaded test wash with a soiled reference plate shows whether results are back to normal.
03
Water Leaking Around the Machine
Priority: highWater appearing on the kitchen floor during or after a run can come from the door, the tub floor, or the plumbing beneath it. Locating the exact point matters, because a slow leak under the cabinetry can damage flooring long before it becomes visible.
- Likely origins
- worn door gasket · loose drain hose clamp · cracked pump housing · failed water inlet valve · split tub seal
- The fix
- We remove the toe-kick panel and run the machine with the cabinet base dry, watching for the first sign of water. Hose clamps, the inlet valve fitting and the pump seal are examined individually. The leaking component is replaced or resealed, the floor area is dried, and a second complete cycle with a dry paper towel beneath the unit confirms the leak has stopped.
04
Dishes Still Wet After the Cycle
Priority: mediumGlassware and plastics holding droplets after the drying stage suggest that heat or airflow is falling short. Plastic always dries less well than ceramic, but when even plates stay soaked, the drying system itself deserves attention.
- Likely origins
- failed heating element · empty rinse aid dispenser · faulty high-limit thermostat · vent fan motor failure · control board relay fault
- The fix
- We confirm the rinse aid reservoir is filled and the dry setting is selected, then measure the resistance of the heating element and its thermostat. On condensation-dry models the vent and fan are tested instead. Any open element or failed fan is replaced, and a full cycle followed by a check of the top rack confirms that dishes finish dry.
05
Machine Will Not Begin a Cycle
Priority: mediumWhen the dishwasher stays silent after a cycle is chosen, the control is refusing to start, normally because a safety condition is not met. Lights may still show, which tells us that power reaches the control board even though nothing runs.
- Likely origins
- faulty door latch switch · tripped thermal fuse · failed control board · child lock engaged · defective touchpad
- The fix
- We verify supply voltage at the junction box, then check that the child lock is off and the door latch switch closes when the door is shut. The thermal fuse and touchpad ribbon are tested for continuity. Once the failed part is replaced, the machine is started from each selected cycle to confirm it fills on command.
06
No Water Entering the Tub
Priority: highA dishwasher that hums or clicks but never takes in water cannot wash anything. The supply valve, the inlet valve and the float switch all have to cooperate before the controller will open the fill path.
- Likely origins
- failed water inlet valve · stuck float switch · closed supply shut-off valve · clogged inlet screen · control board fault
- The fix
- We confirm the shut-off under the sink is open and that water pressure reaches the appliance. The inlet valve solenoid is then checked for voltage and resistance, and the float is lifted by hand to test its switch. A failed valve or float is replaced, and the fill level is observed through a complete fill stage to verify correct operation.
07
Water Rising Past the Normal Level
Priority: criticalWater reaching the bottom of the door, or spilling onto the floor during fill, means the machine is not stopping the fill when it should. Because the valve is under mains pressure, a stuck valve will keep feeding water until something intervenes.
- Likely origins
- water inlet valve stuck open · float switch jammed by debris · failed float switch · faulty pressure sensor · control board holding the valve on
- The fix
- Close the supply valve under the sink and switch off the dishwasher's breaker before mopping up. We then check whether the inlet valve passes water with power removed, which identifies a valve that no longer seals. The float and its switch are cleaned and tested for movement. After the faulty part is replaced, a supervised fill confirms water stops at the correct line.
08
Filter Assembly Clogged
Priority: mediumDebris collected in the cylindrical filter at the base of the tub restricts the water the pump can draw. Owners often notice gritty dishes, slow draining, or a murky pool sitting around the filter housing.
- Likely origins
- accumulated food debris · broken glass fragments · grease and detergent sludge · damaged filter mesh · label or seed lodged in housing
- The fix
- The filter is unlocked, removed and cleaned, and the sump beneath it is cleared of anything that slipped past. We inspect the fine mesh for tears that would allow debris into the pump. A damaged filter is replaced, and we show the owner the quarter-turn removal so it can be rinsed regularly. A drain cycle confirms flow is restored.
09
Persistent Unpleasant Odour
Priority: mediumA sour or rotten smell when the door opens is usually trapped food and stagnant water decaying somewhere in the system. Odours that return quickly after cleaning hint at water siphoning back from the drain line.
- Likely origins
- food trapped in filter · standing water in sump · missing drain high loop · bacterial film in door gasket · blocked disposal connection
- The fix
- We clean the filter and sump, wipe down the gasket folds, and check whether water returns to the tub while idle. If it does, the drain hose is rerouted into a proper high loop or an air gap is cleared. A hot cleaning cycle is then run, and the tub is checked after standing to confirm no odour returns.
10
Door Will Not Close or Latch
Priority: mediumThe door swings up but stops short of latching, or springs back open. Usually something physical is in the way, such as a rack wheel, a utensil or a displaced tub gasket, though a broken latch mechanism produces the same complaint.
- Likely origins
- rack rollers off their rails · broken door latch · misaligned strike on the tub · dishwasher not level in its opening · stretched or displaced gasket
- The fix
- We pull both racks, close the door empty and watch where it binds, which tells us whether the latch, the racks or the installation is at fault. Rack rollers and stops are refitted or replaced, and the unit's levelling feet and mounting brackets are checked. A failed latch assembly is replaced. The door is opened and closed repeatedly to confirm a positive latch every time.
11
Unusual Noises During Operation
Priority: mediumRattling, grinding or a loud hum that was not present before generally means something is obstructing a moving part or a bearing is wearing. Noise that coincides with draining points to the drain pump, while noise throughout the wash points to the circulation motor.
- Likely origins
- foreign object in wash pump · worn wash motor bearings · drain pump impeller damage · spray arm striking dishes · loose mounting brackets
- The fix
- We run the cycle while listening at the sump to separate wash noise from drain noise. The pump housings are opened and inspected for glass, bones or plastic caught in the impellers. Damaged impellers or seized motors are replaced, loose brackets are tightened, and a complete quiet cycle confirms the source has been dealt with.
12
Water Escaping at the Door
Priority: highMoisture running down the front panel or dripping from the lower door edge points to a seal problem or excess suds. Because the door sees the full spray, even a small gap in the gasket lets water out.
- Likely origins
- worn door gasket · misaligned door hinges · excessive detergent suds · damaged lower door seal · machine not level
- The fix
- We examine the gasket around the full perimeter for flattening, tears and food residue, and check the lower splash shield. The cabinet is levelled and the hinge springs inspected for door alignment. Failing seals are replaced, the correct detergent dose is confirmed, and a test cycle with paper on the floor verifies the door stays dry.
13
Spray Arm Jets Blocked
Priority: mediumIndividual jets on the spray arms are blocked by food particles, seeds or mineral scale. The arm may still turn, but water leaves unevenly and some areas of the rack get little coverage.
- Likely origins
- food bypassing a damaged filter · seeds or glass fragments in the jets · hard-water scale · arm bearing clogged · filter not cleaned regularly
- The fix
- We remove each spray arm, flush it from the inside and clear individual jets with a fine probe. Scale is dissolved with a descaling solution. The filter is checked for tears that let debris through. Arms are refitted and their rotation and spray pattern observed with the door switch bypassed.
14
Wash Pump Not Circulating Water
Priority: mediumYou can hear the fill, then silence or a hum where the wash sound should be, and dishes come out barely touched. The circulation pump is not driving water to the spray arms.
- Likely origins
- seized wash pump motor · failed motor start capacitor · impeller jammed by glass or bone · worn motor bearings · control not powering the pump
- The fix
- We remove the filter and look into the sump for debris that could jam the impeller, then check whether the control is delivering voltage to the pump. The motor windings and capacitor are measured. A jammed impeller is cleared; a failed motor is replaced as an assembly. Spray arm rotation is confirmed with a test cycle.
15
Drain Pump Not Working
Priority: highThe drain pump is a small electric motor that expels used water; when it fails, water stays in the tub and error codes often appear. A humming sound without water movement typically means a jammed or burned motor.
- Likely origins
- seized drain pump motor · broken pump impeller · obstruction in pump inlet · open motor winding · control board not powering pump
- The fix
- We access the pump from below and check the inlet for debris before testing motor resistance. Voltage at the pump during a drain command shows whether the control board is responding. A failed pump is replaced with the correct part for the model, and a timed drain test verifies the tub clears fully.
16
Door Latch Not Engaging
Priority: mediumA latch that will not catch, or catches without signalling the control, prevents the dishwasher from starting. Owners may hear no click when closing the door, or find the door will open without resistance mid-cycle.
- Likely origins
- broken latch mechanism · failed door switch · misaligned strike · worn latch spring · cracked inner door panel
- The fix
- We test the latch switch for continuity in both open and closed positions and inspect the strike for alignment. A broken latch is replaced as an assembly, and any panel misalignment is corrected. The door is then opened and closed repeatedly, and a cycle is started to confirm the control recognizes the latched door.
17
Detergent Cup Not Releasing
Priority: mediumFinding the detergent still in its cup at the end of a cycle means the dispenser door was not triggered or could not swing open. Dishes washed without detergent emerge greasy and filmed.
- Likely origins
- failed dispenser actuator · sticky detergent residue · tall item blocking dispenser · worn dispenser spring · control board output fault
- The fix
- We clean dried detergent from the cup and latch, then check that no rack items block the door. The dispenser solenoid or wax motor is tested for resistance and the control output for voltage. A failed actuator is replaced, and a short cycle with detergent loaded confirms the cup opens at the correct stage.
18
Heating Element Not Warming the Water
Priority: mediumWash water stays lukewarm, dishes come out wet and grease is left behind, even though the cycle runs to completion. The element at the base of the tub has either opened or is not being switched on by the control.
- Likely origins
- open heating element · failed high-limit thermostat · faulty water temperature sensor · burned element terminal · control board relay fault
- The fix
- We measure the element's resistance and check it for leakage to ground, then confirm whether the board is actually sending power during the heat stage. The thermostat and temperature sensor are tested alongside, since either can stop heating without the element failing. The defective component is replaced and water temperature is recorded during a full cycle.
19
Water Pooling Beneath the Unit
Priority: criticalWater collecting under or beside the dishwasher indicates a leak inside the base, often from a fitting, pump seal or cracked tub. This is a priority repair because standing water damages subfloor and cabinetry quickly.
- Likely origins
- cracked pump housing · loose inlet valve fitting · split drain hose · worn tub seal · overflow from overfilling
- The fix
- Shut off the water supply to the dishwasher and switch off its breaker, then dry the visible water. We remove the lower panel and run the machine dry to pinpoint the source. The leaking component is replaced or resealed, and the base is monitored through a complete cycle to verify the area stays dry.
20
Upper Rack Poorly Washed
Priority: mediumWhen the lower rack comes out clean but upper dishes remain soiled, the water supply to the upper spray arm is likely restricted. The feed tube and arm connections need to be checked.
- Likely origins
- blocked upper spray arm · disconnected feed tube · failed diverter valve · rack adjuster misaligned · low wash pump pressure
- The fix
- We check that the upper arm docks properly with the feed tube and that the rack adjusters are level. The arm is flushed and the diverter tested. Any broken connection or valve is replaced, and a test wash with soiled items on the top rack verifies proper cleaning.
21
White Spots and Film on Dishes
Priority: lowChalky spots that wipe off with vinegar are mineral deposits left as hard water evaporates from the dishes. Hardness differs from one water district to the next, and a private well can be considerably harder than a public supply.
- Likely origins
- hard water without rinse aid · rinse aid dispenser empty or faulty · water softener setting incorrect · low wash temperature · detergent dose too low
- The fix
- We test the hardness of your incoming water and compare it with the softener or detergent setting the machine is using. The rinse-aid dispenser is checked for correct release, and the wash temperature is measured. Settings are adjusted, scale is removed from the spray arms and tub, and a glassware test load shows whether the spotting has cleared.
22
Wash Results Gradually Getting Worse
Priority: mediumResults that were once good have slipped over months: a little grit on cups, a film on plates, food left in corners. Gradual decline usually reflects slow build-up inside the machine rather than a sudden part failure.
- Likely origins
- partially blocked filter · scale narrowing spray arm jets · wash pump impeller wear · diverter valve sticking · detergent unsuited to water hardness
- The fix
- We dismantle the filter assembly and spray arms and inspect them for scale and debris, then measure circulation pressure by observing arm speed with the door switch bypassed. The diverter is checked for correct switching between arms. Components are cleaned, descaled or replaced as needed, and a normal mixed load is washed to compare results with what you were seeing.
23
Spray Arm Stationary
Priority: mediumA spray arm that does not rotate throws water in a single fixed direction, leaving wide patches of the rack untouched. Owners usually notice that certain dishes are cleaned perfectly while their neighbors stay dirty.
- Likely origins
- clogged spray arm jets · cracked arm hub · worn arm bearing · tall item blocking rotation · weak wash pump pressure
- The fix
- We remove each arm and flush its jets, inspect the hub for cracks and the bearing for wear, and spin it by hand. If the arms are sound but still stall, wash pump pressure is evaluated next. A replacement arm or pump repair is completed, and the arm is watched through the window or by mid-cycle inspection to confirm rotation.
24
Lower Rack Coming Out Dirty
Priority: mediumItems in the lower rack retain food while the upper rack is acceptable. The lower spray arm is either blocked, cracked, or not receiving its share of water.
- Likely origins
- lower spray arm jets blocked · cracked or warped lower arm · diverter not switching to the lower arm · tall items obstructing the arm · wash pump output reduced
- The fix
- We check the lower arm turns freely and inspect it for cracks, then confirm the diverter sends water to it during the wash stage. Blocked jets are cleared and damaged arms replaced. Loading is reviewed with you if items are blocking rotation. A test wash with soiled items in the lower rack confirms the improvement.
Further entries on file · 16
- No Water Entering the Tub
- Humming Without the Cycle Starting
- Fills Then Immediately Pumps Out
- Leak Protection Has Shut the Machine Down
- Detergent Left Undissolved
- Rinse Aid Level Not Dropping
- Food Particles Redeposited on Dishes
- Fill Level Too Low
- Machine Fed Only Cold Water
- Fault Code Shown on the Display
- Cycle Stops Part Way
- Control Board Faults
- Grinding From Below the Tub
- Burning Smell During a Cycle
- Steam Escaping Around the Door
- Water Backing Out of the Sink Air Gap
Next step
Sounds like your machine?
A person picks up day or night, seven days a week.
Platforms · 27
Makes of dishwasher on our books
These 27 names genuinely produce a dishwasher; a pairing that was never manufactured has no page here.



























Specification
Dishwasher work, measured
- 1–2 hours
- Usual visit length
- 27
- Brands we repair
- 119
- ZIP codes covered
Consumable and protective parts
On a dishwasher: Water Left Standing in the Tub · Dishes Coming Out Dirty · Water Leaking Around the Machine · Dishes Still Wet After the Cycle
Motors, pumps and mechanical assemblies
On a dishwasher: Water Left Standing in the Tub · Dishes Coming Out Dirty · Water Leaking Around the Machine · Dishes Still Wet After the Cycle
Control electronics and boards
On a dishwasher: Dishes Still Wet After the Cycle · Machine Will Not Begin a Cycle · No Water Entering the Tub · Water Rising Past the Normal Level
Service areas
Towns we cover for dishwasher repair
- Great Neck
- Mineola & Garden City
- Hempstead
- Floral Park & Franklin Square
- Freeport & Baldwin
- Hewlett & East Rockaway
- Lynbrook & Rockville Centre
- Glen Cove
- Merrick & Bellmore
- Roslyn
- Westbury
- Bethpage & Farmingdale
- Hicksville
- Levittown & Wantagh
- Massapequa & Seaford
- Oyster Bay & Syosset
- Babylon & Lindenhurst
- Bay Shore & Islip
- Brentwood & Central Islip
- Commack & Deer Park
- Huntington
- Northport & Kings Park
- Lake Grove & Hauppauge
- Farmingville, Holtsville & Medford
- Patchogue & Sayville
- Bellport & Brookhaven
- Port Jefferson & Stony Brook
- Rocky Point & Wading River
Further reading
Notes written at the bench
Questions
Questions owners ask about dishwasher repair
If yours is missing, put it to a coordinator directly.
Something not covered?
The line is staffed at all hours for Nassau and Suffolk.
What brands do you service in Long Island?
All forty-eight brands on our list. In everyday kitchens and laundry rooms that includes Whirlpool, Samsung, GE, LG, Frigidaire, Maytag, Bosch, KitchenAid, Kenmore, Electrolux and Amana; in built-in and professional kitchens it includes Sub-Zero, Wolf, Thermador, Viking, Gaggenau, Miele, Fisher & Paykel and Dacor. We also handle commercial lines such as Hoshizaki, Manitowoc, Scotsman, True, Hobart, Turbo Air and Vulcan, which matters in Long Island because small commercial kitchens sit on the same routes as the home visits.
Are evening or weekend visits in Long Island more expensive?
No. Our phones are answered 24/7, and a repair in Long Island costs exactly what it would on a weekday morning, whatever hour of the night or day of the week you call; there is no emergency loading, nothing extra after hours, nothing extra on a Saturday. The variable overnight overnight is availability, not cost: with fewer vans out, a call at 2am is normally scheduled for early the next morning rather than sent out on the spot.
What warranty comes with the repair?
Parts we install come with a 90-day warranty; our workmanship comes with 30 days of cover. Should the same fault come back within the labor period, we return without charging a second diagnostic fee. The cover applies to the work we did — it is not a maintenance contract on the entire appliance — so a separate component giving out further down the line is its own job, and we will be clear about which situation you are in.
Do you take jobs in Long Island apartments and condos?
We do. Across Long Island, co-ops, condominiums, garden-apartment complexes and accessory units are all common, and a building run by a board or a managing agent usually expects its paperwork in order and an elevator or shared laundry room booked before anyone arrives. Our coordinator sorts that out ahead of dispatch, so give us the building's name on (631) 729-9995. We stock compact 24-inch and stacked-laundry parts, since that is the equipment most such buildings contain.
Dishwasher · Long Island
Servicing the dishwasher on Long Island
The dishwasher symptom that misleads most
Whatever the brand, the dishwasher problem most frequently misjudged is plastics left wet and dishes left cool by a condensation-drying model, which on most European designs is intended behavior, not a defect. Getting it wrong matters, because a mistaken reading leads to a mistaken part, and on a dishwasher that part is often the costliest in the machine.
The time of year drives our Long Island schedule more than most people would guess. The first heatwave triggers a run of refrigeration calls; the first hard frost brings dryers without heat, burst supply lines and garage refrigerators that have silently stopped cooling; late November brings ovens unable to hold their set temperature.
The practical upshot is that a refrigerator making a strange noise in April is far easier to schedule than the same one in July, and much cheaper to repair, because replacing a condenser fan early is simple while the compressor it was shielding is a different matter.
Most food loss in Long Island happens in the garage freezer, and it seldom gives any warning. No code appears, no alarm sounds, and nothing looks wrong until the contents have thawed and frozen again.
For any unit kept in an unheated space, a standalone thermometer with a remote alert is worth more than a service contract, because it warns you while the food can still be rescued. If the appliance is genuinely faulty we will repair it, but you should know that room temperature is often the entire explanation.
Book a visit
Describe the machine, then add contact details. Booking is free and places you under no obligation. You can also phone (631) 729-9995 and a dispatcher will note everything for you.
Arrange a dishwasher visit
Two short steps. No cost and no obligation to book.
- Answered 24/7
- 3-hour arrival window
- Price approved first